Saturday, May 23, 2009

ASSEMBLING THE DRIVE TRAIN

Assembling the drivetrain inside of the frame was definitely one of the most tense moments - taking all of our custom machined components and putting them to the ultimate test. We tested the fit of the components together and made sure nothing was rubbing on the inside of the frame. Though the assembly operation required a Leatherman, allen wrenches, and several improvised hooks, we were able to put everything together fine. The fit of the parts erred on the side of too tight. Only a couple of points inside the frame had to be sanded away to allow the chain to clear.


Saturday, May 16, 2009

FIRST ROUGH ASSEMLBY

Having the frame, the front fork and the spoked wheels we could roughly assemble the parts and get a gasp of how the actual bike will look. A very exciting moment!


THE FRONT FORK

A lot of discussions took place about the design of the front fork, but no it´s finally done.

THE SEAT

Krisa spent a lot of time working on the seat and it´s starting to pay off. Completly made out of carbon fibre, it will be an important touchpoint between the rider and the bike. Especially with our concept with the crank before the saddle it is important that the seat offers enough back support.

SANDING, LAYING, SANDING, LAYING....

To get enough stiffness and stability in the frame we have to lay layer over layer and do in between lots and lots of sanding.

Friday, May 15, 2009

Components, components, components

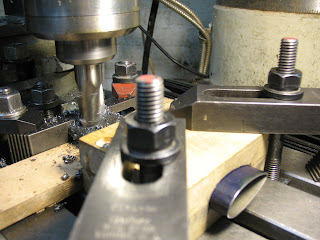
Mike's setup for the crown - it is cut off-center in order to achieve a press fit with the crown race.

Hemi, the lathe master. 

Nick, the machinist machine.

Nick's setup with a custom jig in order to drill accurately into the airfoil tubing for the fork.

Adrian cleaning components in our clean room before setting them in the carbon fiber. Not pictured - the rest of the team standing around in haz-mat suits.

Sunday, May 10, 2009

DRYING PROCESS

For a faster drying process we built a very rough but functioning case with a heating lamp around the modell.

LAYING CARBON FIBRE

After long time of preparation we finally have all the parts together and can start laying the carbon fibre. In a first round we secured all our hardpoints around the drive train by setting up the machined parts and laying the carbon fibre around these points.


SETTING UP THE JIG

Having finished the machinig and the pink foam modell we started setting up the jig. All the collected informations from the prototype and the real size drawing are coming together now.

PINK FOAM MODELL

Parallel to the machining we started working on the pink foam model, which will be the base for the laying of the carbon fibre.

The first rough cut and the stencil.

The final shape.

The intermediate hub will be placed in here.

Monday, May 4, 2009

SOME IMPRESSIONS OF THE HARD WORKING STUDENTS


NEW DESIGN

After locating the new position of the transfer hub, we had to come up with a new design. Biggest change is the drastic shortening of the rear fork and enlongment of the actual body. Further on, based on the new location of the transfer hub we had to relocate the saddle and integrated him into the body.

COLLIDING DRIVE CHAIN

Having set up the drive chain, we took advantage of the fact that we have the first time actual 3 dimensional hard points. A quick seat testing showed that the position of the drive chain is colliding with pedaling. This means that we have to rearrange the components which consequently had a huge impact on the design of the bike.

Sunday, May 3, 2009

Drive Train Assembled


We finished fixing the drive train to the jig on Saturday night, and we have the final (we hope) coordinates for the components.

The design has changed according to this. Some stuff had to be changed/removed, and other needs to be redesigned to fit the new layout.

We plan to have the pink foam for the body on today and
continue working on the other parts (brake, front fork, seat). It's quickly coming to the final stretch.